
TL;DR: The Zenflow Miro integration lets your AI agent read, analyze, and document any Miro board directly from your workflow. Connect in under two minutes — no API keys, no scripts. Your agent can explain diagrams, identify design decisions, and surface insights across boards without you copying a single sticky note.
What Is the Zenflow Miro Integration?
The Zenflow Miro integration is a native connection between Zenflow's AI agent and your Miro workspace. Once connected, Zenflow can read boards, items, comments, prototypes, and diagrams from Miro — and use that context to assist with design analysis, documentation, onboarding flow mapping, and architecture review — all inside your existing Zenflow task.
Unlike Miro's native automation features, the Zenflow Miro integration brings your boards directly into an AI agent context. Instead of exporting PNGs and describing diagrams manually, you share the board URL and ask your agent to explain what it sees.
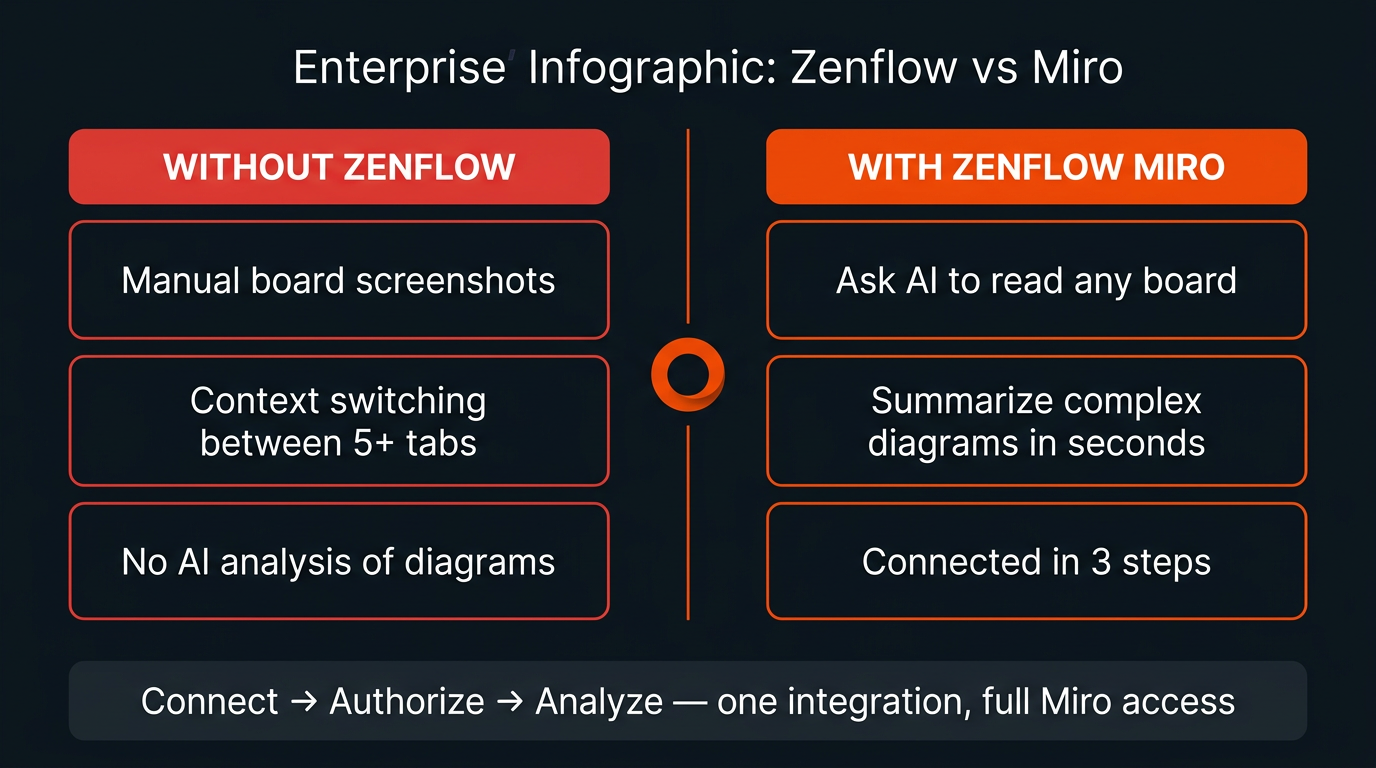
Zenflow Miro vs. Manual Miro Workflows
| Task | Without Zenflow | With Zenflow Miro |
|---|---|---|
| Read a diagram | Screenshot then describe to AI manually | Share board URL — agent reads it directly |
| Explain an onboarding flow | Write out each step by hand | Agent returns structured breakdown in seconds |
| Document board content | Copy-paste sticky notes and labels | Agent drafts documentation from live board data |
| Review architecture diagrams | Describe the diagram in your prompt | Agent accesses the board and analyzes nodes directly |
| Integration setup | Custom Miro API scripts | 3-step OAuth, no code required |
Connecting Miro to Zenflow: Step-by-Step
The Zenflow Miro integration uses secure OAuth through the Miro MCP protocol. There are no API keys to manage and no scripts to write. Here is the complete setup from the Connections panel to your first board query.
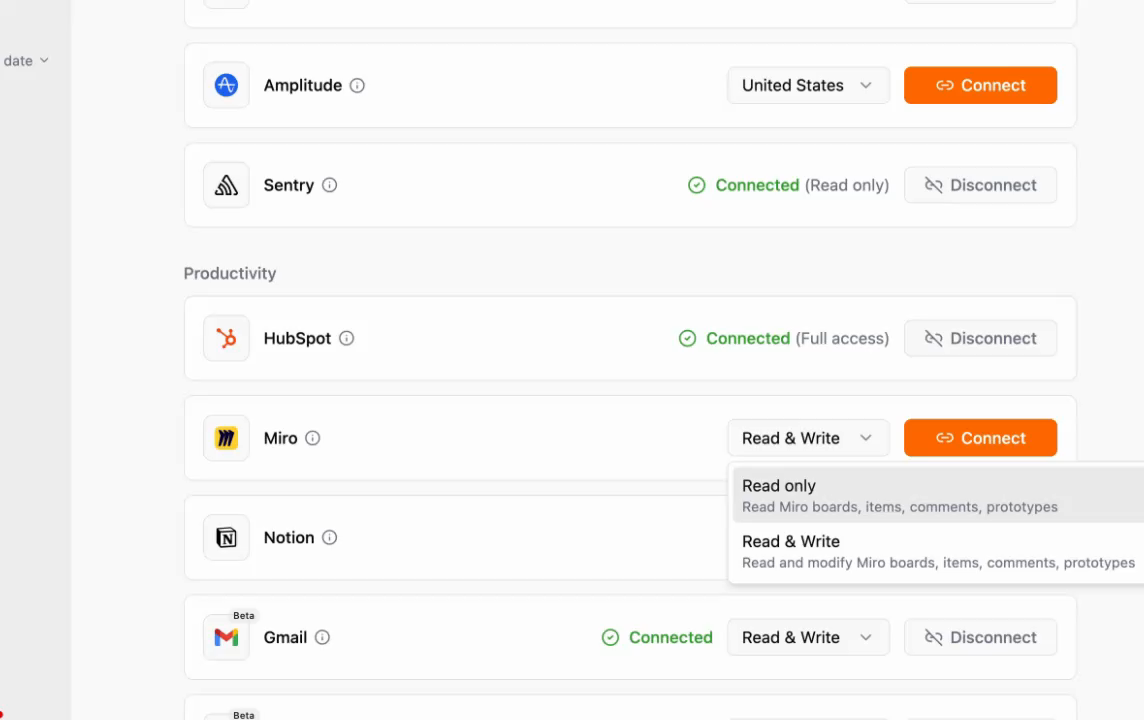
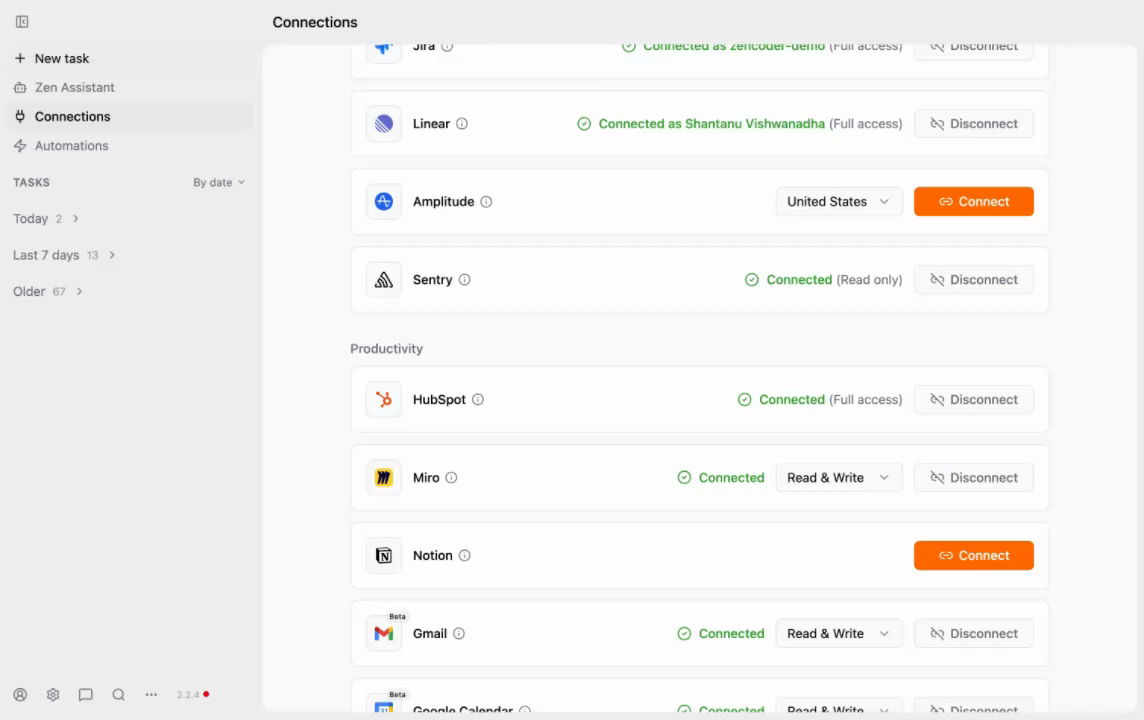
Step 1: Open Connections and Select Miro
Navigate to the Connections panel in Zenflow. Scroll to the Productivity section. Locate Miro and open the permission scope dropdown. You will see two options:
- Read only — Reads Miro boards, items, comments, and prototypes. Use this when you only need the agent to analyze and summarize content.
- Read and Write — Reads and modifies Miro boards, items, comments, and prototypes. Use this when you want the agent to add documentation, update items, or create new content directly on the board.
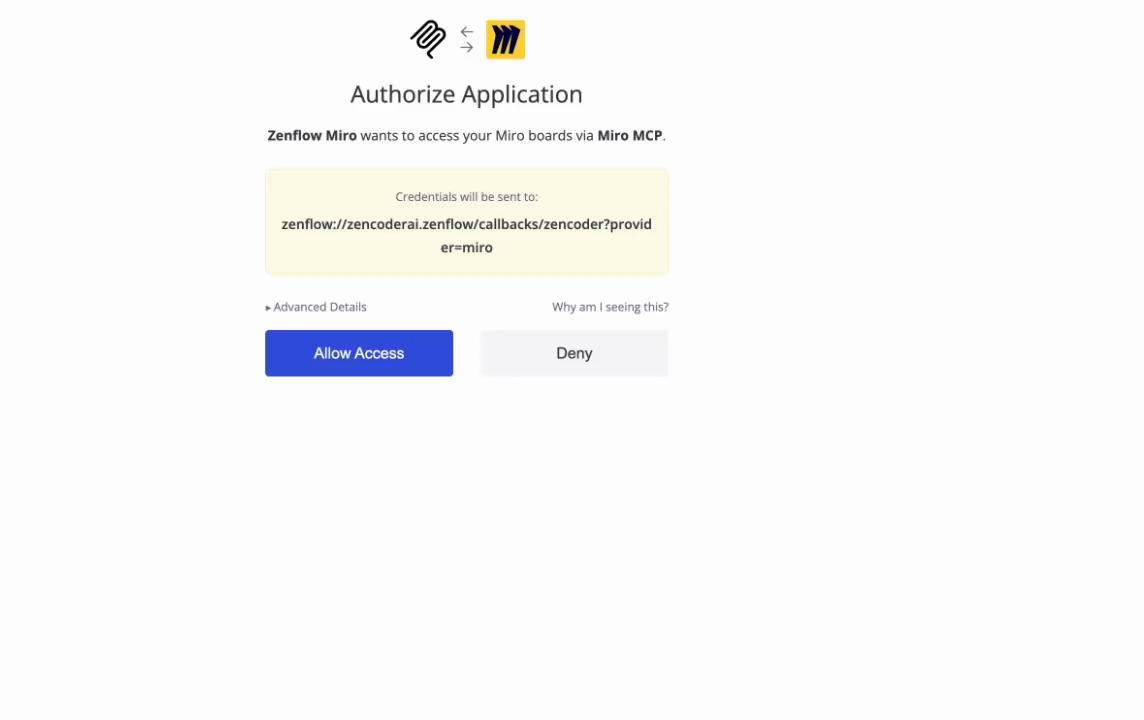
Step 2: Authorize via Miro OAuth
After selecting your scope and clicking connect, Zenflow opens the Miro authorization page. The page confirms that Zenflow is requesting access to your Miro boards via the Miro MCP. Review the permissions and click Allow Access.
Step 3: Select Your Organization and Team
The Miro MCP server asks you to select which organization and team the connection should apply to. Select your organization from the dropdown, choose the appropriate team, and click Add. This scopes the integration precisely — your agent only accesses boards available to that team, protecting boards in other workspaces.

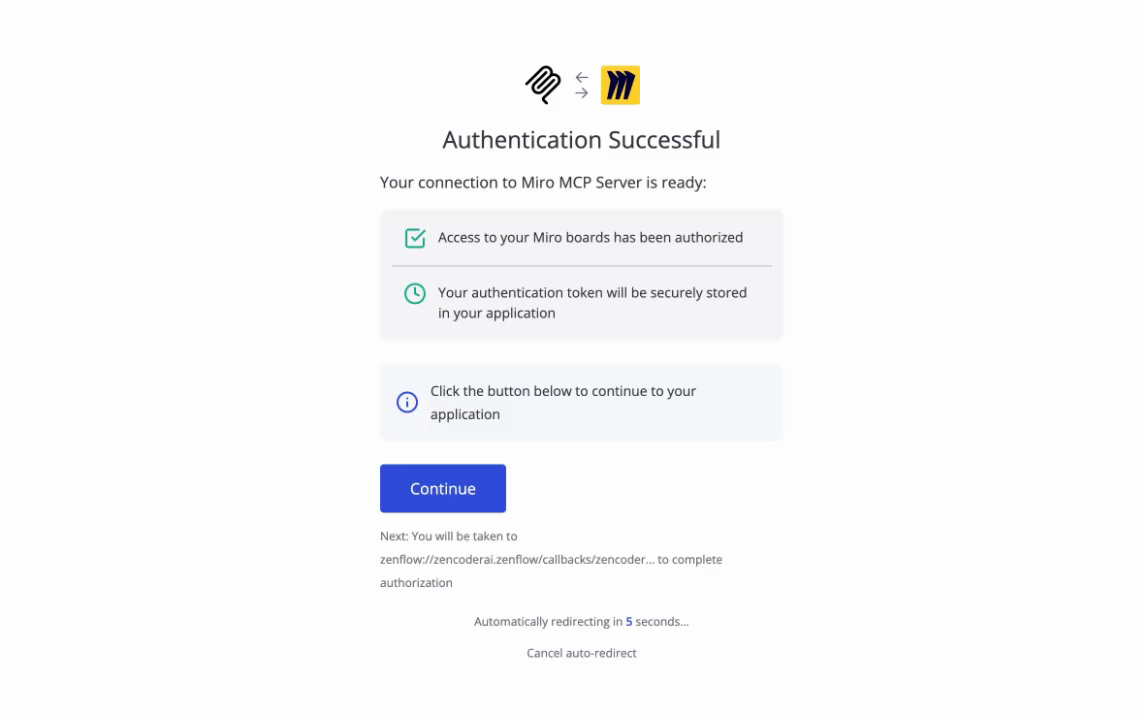
Step 4: Confirm Authentication
Miro confirms the connection with an Authentication Successful screen. Your token is securely stored and the connection is immediately active in Zenflow. Click Continue or let the page auto-redirect in five seconds.
Step 5: Verify the Connection in Zenflow
Return to the Connections panel in Zenflow. Miro now shows Connected (Read and Write) alongside your other integrations. The Zenflow Miro integration is live and ready to use in any task.
How Zenflow Reads and Analyzes Miro Boards
Once connected, you can reference your Miro workspace in any Zenflow task. The agent searches your workspace for boards by name. Once you provide a board URL, it reads all items, shapes, connectors, labels, and sticky notes on that board and produces a structured analysis.
One practical note: the Miro search API does not return direct board URLs in its results. If your agent locates a board by name but needs to explore it further, paste the board URL from your browser address bar into the task. This is a one-time action per board — the agent handles the rest.
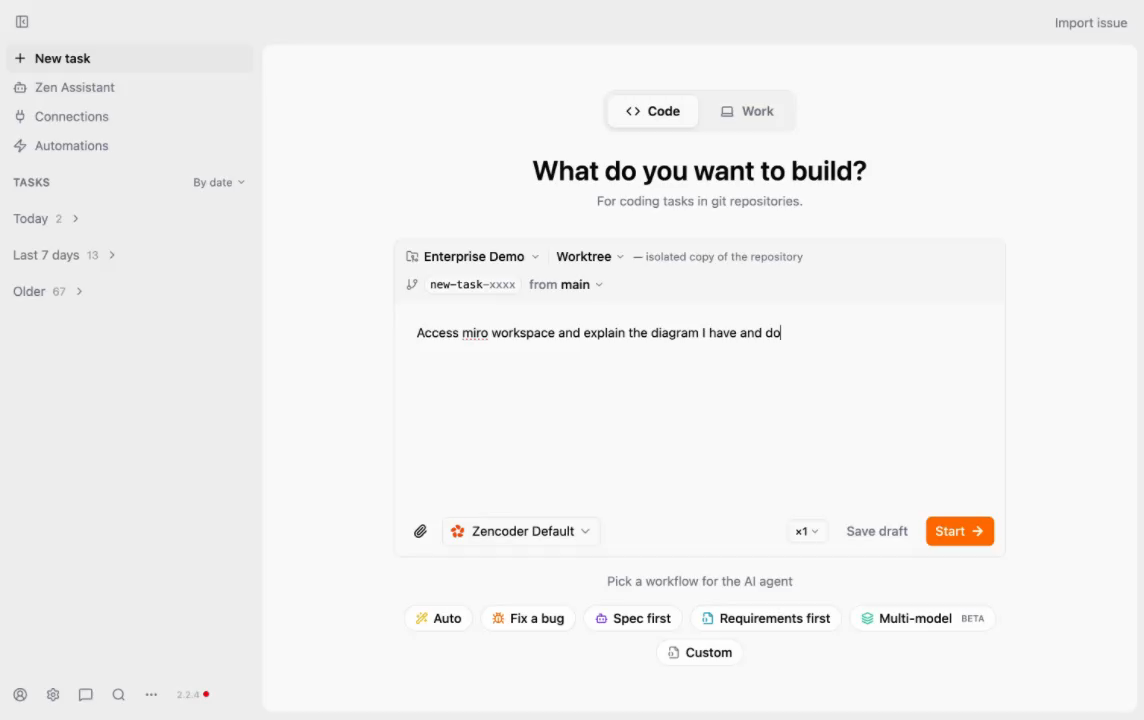
Live Example: AI Explains a Complex Onboarding Diagram
In this walkthrough, a product team maintains their full user onboarding flow as a Miro diagram. The diagram spans multiple stages and is the reference document for developers, designers, and product managers. Rather than scheduling a meeting to walk through it, they used Zenflow to explain it on demand.
The task prompt: Access my Miro workspace and explain the diagram I have. Document it.
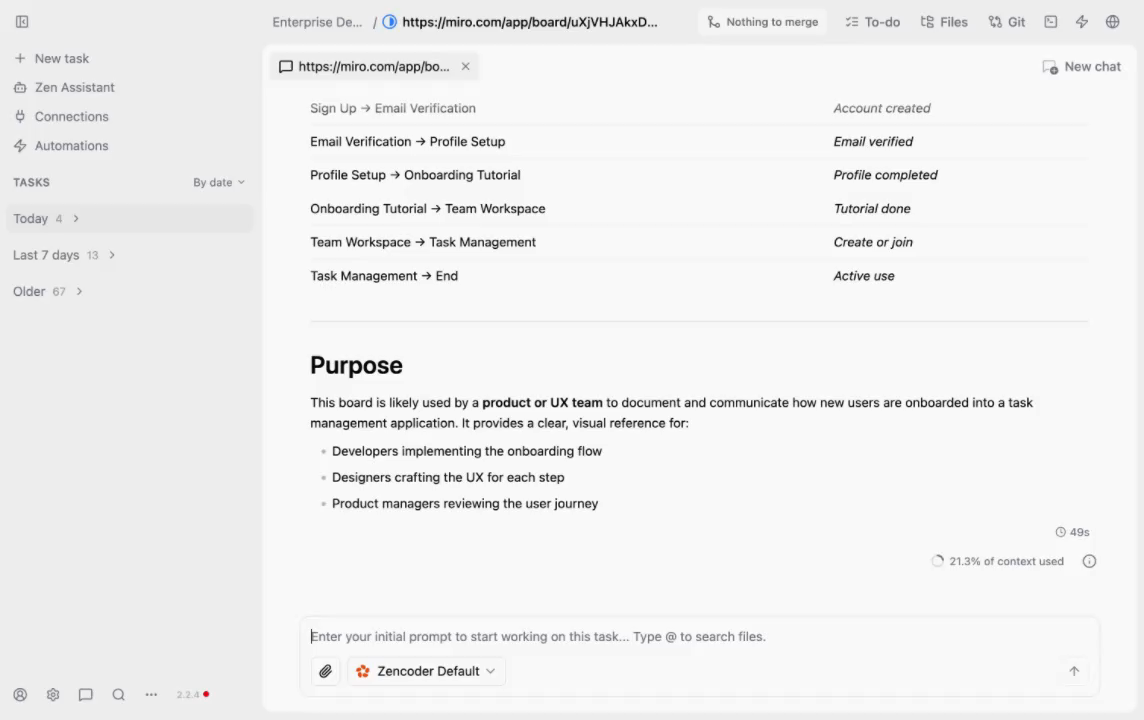
After providing the board URL, the agent returned a complete structured breakdown in under 60 seconds:
- Sign Up to Email Verification — account created
- Email Verification to Profile Setup — email verified
- Profile Setup to Onboarding Tutorial — profile completed
- Onboarding Tutorial to Team Workspace — tutorial done
- Team Workspace to Task Management — create or join
- Task Management to Active Use
The agent also identified the board's purpose: This board is used by a product or UX team to document and communicate how new users are onboarded. It provides a visual reference for developers implementing the flow, designers crafting the UX, and product managers reviewing the user journey.
No manual transcription. No screenshots. No meeting needed.
Enterprise Use Cases for Zenflow Miro
The Zenflow Miro integration is particularly valuable for teams that use Miro as the primary documentation layer for architecture, product, and process design.
- Architecture reviews — Ask your agent to explain system architecture diagrams before code reviews, so every engineer enters with shared context.
- Sprint retrospectives — Summarize retrospective boards automatically and extract action items without manual note-taking.
- Design handoff — Have the agent read a UX flow board and generate developer-facing documentation directly from diagram nodes.
- Onboarding documentation — The agent reads onboarding flow boards and produces structured written documentation ready for your internal wiki.
- Customer journey mapping — Connect Zenflow to both Miro and HubSpot to read journey map boards and cross-reference them against real CRM data from your pipeline.
Teams already using the Zenflow Sentry integration for automated bug resolution and the Zenflow Stripe integration for payment automation can layer Miro on top to close the loop between visual planning boards and live production data.
Frequently Asked Questions
What can Zenflow do with Miro?
With the Zenflow Miro integration, the AI agent can read boards, items, sticky notes, connectors, labels, comments, and prototypes. With Read and Write access, it can also create and modify board content. Use it to explain diagrams, generate documentation from boards, summarize retrospectives, and analyze user flows.
Does the Zenflow Miro integration require an API key?
No. The connection uses Miro's standard OAuth flow via the Miro MCP protocol. You authorize Zenflow through your Miro account in your browser — no API keys or developer tokens needed.
What is the difference between Read only and Read and Write in Zenflow Miro?
Read only allows the agent to access and analyze board content without making changes. Read and Write lets the agent create, update, and add items to boards — useful when you want the agent to add documentation or structure directly to the board after analyzing it.
Can Zenflow search across all my Miro boards?
Yes. The agent can search your connected Miro workspace by board name. Once it locates a board, you provide the board URL and the agent reads the full contents. The search covers all boards available to the organization and team you selected during setup.
Is my Miro data secure with Zenflow?
Yes. The Miro OAuth token is securely stored in Zenflow's encrypted credential store. The integration is scoped to the specific organization and team you authorized during setup. Boards outside that scope are not accessible to the agent.
Which teams benefit most from the Zenflow Miro integration?
Product teams, engineering teams, and design teams who use Miro as their documentation layer get the most value — especially teams who maintain architecture diagrams, onboarding flows, customer journey maps, and sprint retrospectives in Miro.
Can the agent update Miro boards based on data from other integrations?
Yes, with Read and Write access. You can prompt the agent to read data from a connected integration — such as Jira tickets or HubSpot contacts — and reflect that data back into a Miro board. This makes Zenflow a bidirectional bridge between your planning boards and your live system data.
How do I disconnect Miro from Zenflow?
Open the Connections panel in Zenflow, locate Miro under the Productivity section, and click Disconnect. This immediately revokes the token and removes all board access. You can reconnect at any time by repeating the OAuth authorization flow.
Getting Started with Zenflow Miro
The Zenflow Miro integration is available today for all Zenflow users. Open the Connections panel, select your permission scope, authorize via Miro OAuth, and your agent is ready to read, analyze, and document any board in your workspace.
For teams working across multiple integrations, Zenflow connects Miro alongside your existing dev and productivity tools — Jira, Linear, Sentry, HubSpot, GitHub, Slack, and more — giving your agent the right context wherever it lives.
Visit zencoder.ai to get started.