
What Is the Zenflow Stripe Integration?
The Zenflow Stripe integration is a native connection that gives Zenflow's AI agent direct, secure access to your Stripe payment data — customers, charges, balances, subscriptions, and invoices — through natural language prompts inside any Zenflow task. Instead of switching between your IDE and the Stripe dashboard, you ask the agent directly: "Show me the last customer's details" or "What is the current account balance?" — and it returns structured data instantly, without leaving your workflow.
It connects via Stripe's official MCP OAuth flow, supports granular permission scopes per resource, and works in both Code mode and Work mode inside Zenflow.
Key Takeaways
- Native Stripe OAuth: Connect in under 2 minutes — no API keys to manage manually.
- Granular permissions: Choose exactly what the agent can access — Accounts, Balance, Charges & Refunds — with None / Read / Write controls per resource.
- Natural language queries: Ask for payment data in plain English — the agent handles the rest.
- Enterprise-ready: Admins can enable MCP access organization-wide from the Stripe authorization page.
Zenflow Stripe vs Querying Stripe Manually: What Changes
Before the Zenflow Stripe integration, accessing payment data mid-workflow meant context switching: opening a browser, navigating to the Stripe dashboard, filtering records, and copying data back to wherever you needed it. Here is what that gap looks like in practice:
| Task | Without Zenflow | With Zenflow Stripe Integration |
|---|---|---|
| Customer lookup | Open Stripe, search by email, copy details | Ask the agent in plain English — returns inline |
| Balance check | Navigate to Stripe dashboard home | One prompt — Available + Pending returned in seconds |
| Failed charge investigation | Filter Stripe events, locate charge, read logs | Ask alongside your incident context in the same task |
| Daily revenue summary | Manual export or third-party reporting tool | Scheduled Zenflow automation — posts to Slack automatically |
| Refund request | Open Stripe, find charge, initiate refund, confirm | Agent handles with Write scope — reviewable before execution |
The integration does not replace the Stripe dashboard for complex financial management — it eliminates the routine switching that interrupts development and operations workflows.
Where to Find the Stripe Integration in Zenflow
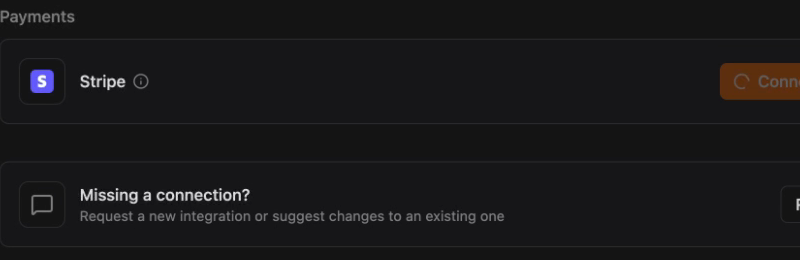
The Zenflow Stripe integration lives under the Payments section in Zenflow's Connections panel — a dedicated category that reflects how Zenflow treats financial data as a first-class integration type, separate from productivity and communication tools.
Open the sidebar, click Connections, and scroll to the Payments section. Click Connect next to Stripe. Zenflow redirects you to Stripe's OAuth authorization page immediately.
How to Connect Stripe to Zenflow: Step-by-Step Setup
The full Zenflow Stripe integration setup takes under two minutes via OAuth. No API keys, no manual token management.
Step 1: The Stripe Authorization Screen
You are redirected to Stripe's native MCP OAuth endpoint. The screen shows your connected Stripe account (with a switch account option for multi-account setups) and a permission configuration panel.
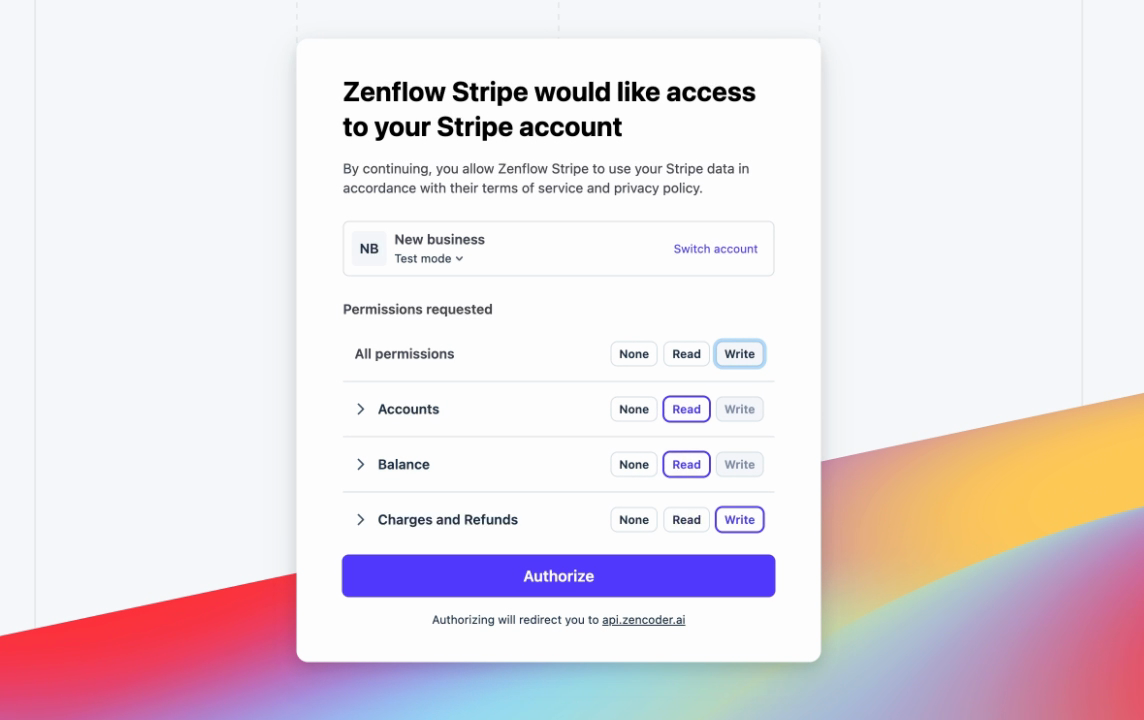
The Permissions requested section shows granular controls for each resource category:
- Accounts — Read (default)
- Balance — Read (default)
- Charges and Refunds — Write (default, allows the agent to issue refunds)
Set each permission to None, Read, or Write based on your use case. For read-only workflows — reporting, customer lookups, balance checks — set all permissions to Read and revoke Write entirely.
Step 2: Enable MCP Access (Enterprise Admin Step)
If MCP access is disabled organization-wide on your Stripe account, the page surfaces a notice: "MCP access is currently disabled for this account. As an administrator, you can turn access on for all your team members." Click Enable for this account to activate it org-wide. This is a one-time admin action — teammates connecting Zenflow to Stripe afterward will not need to repeat it.
Step 3: Authorize and Confirm
Click Authorize. Stripe processes the OAuth handshake and completes the token exchange securely.
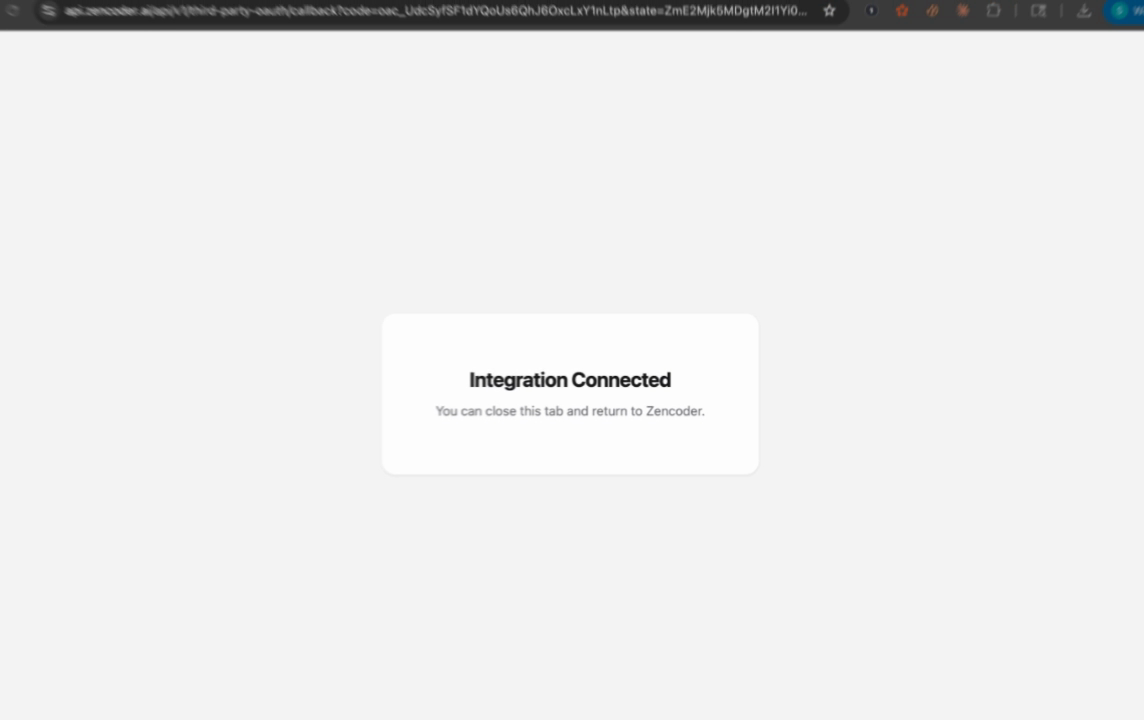
You will see "Integration Connected". Close the browser tab and return to Zenflow. The Stripe card in the Connections panel updates to show the connection as active — the AI agent now has access to your Stripe data within the scopes you authorized.
What the Zenflow Stripe Integration Can Access
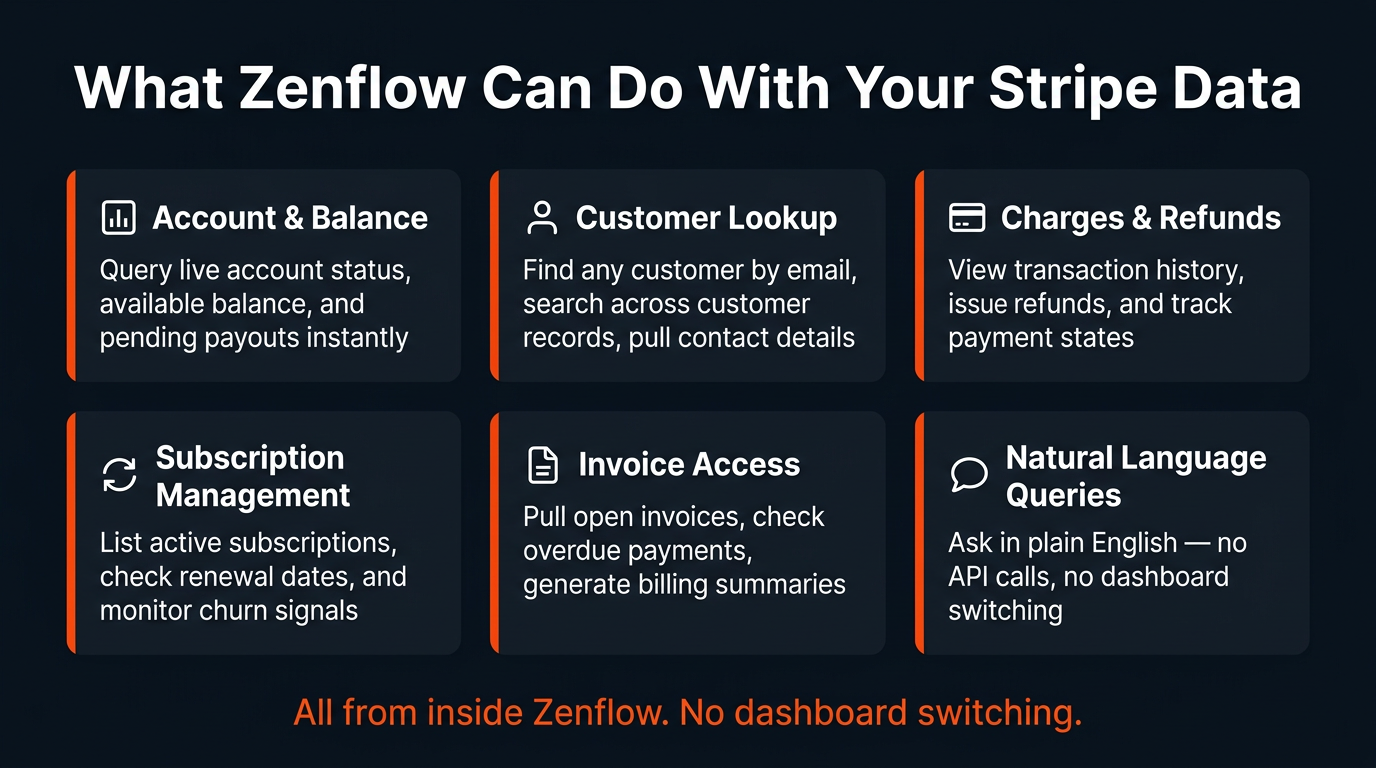
Once the Zenflow Stripe integration is live, the agent can access the following data natively inside any task:
- Account & Balance — Account ID, display name, mode (test/live), available balance, and pending payouts
- Customer Lookup — Search by email, list recent customers, pull full contact records and metadata
- Charges & Refunds — View transaction history, check charge status, initiate refunds (Write scope required)
- Subscription Management — List active subscriptions, check renewal dates, monitor cancellation signals
- Invoice Access — Pull open invoices, identify overdue payments, generate billing summaries
- Natural Language Queries — All of the above accessible via plain English — no Stripe dashboard, no API calls
Live Demo: Querying Stripe Data Inside Zenflow
Here is what the Zenflow Stripe integration looks like in action. A prompt typed directly into a Zenflow task panel:
"Use Stripe Integration and get the account details and last customer details"
The agent picks up the intent, reaches into the connected Stripe account, and returns structured data — without leaving the IDE, without switching tabs, without an API reference in sight.
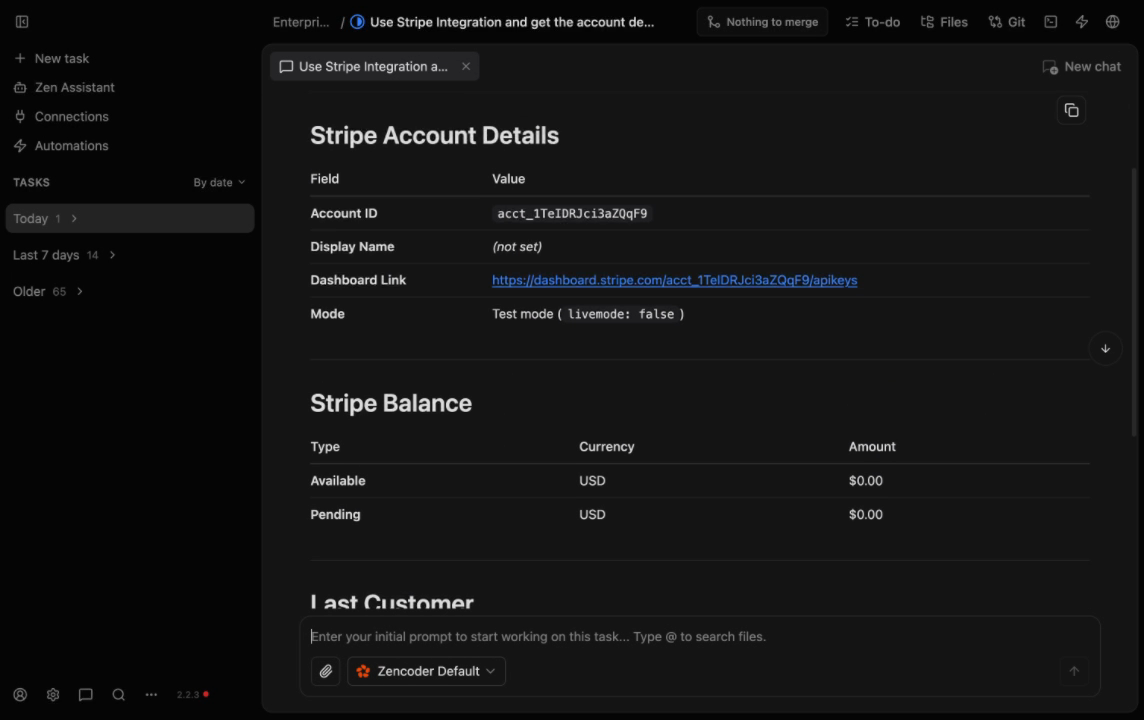
The response includes:
- Stripe Account Details: Account ID, Display Name, Dashboard Link, Mode (test/live)
- Stripe Balance: Available and Pending amounts per currency
- Last Customer: Full customer record including email, metadata, and creation date
Enterprise Use Cases for the Zenflow Stripe Integration
Pre-Sales and Renewal Preparation
Before a renewal call, ask the agent to pull the customer's subscription status, last payment date, and any open invoices — all without opening Stripe. The data surfaces inline alongside your task notes and CRM context, so the full picture is in one place before the call starts.
Billing Incident Response
When a payment failure alert fires, create a Zenflow task and ask the agent to pull the failed charge details, customer contact information, and current subscription status in a single query. Pair the Zenflow Stripe integration with Zenflow's Sentry integration to correlate billing failures with application errors for a complete incident timeline.
Automated Revenue Reporting
Use Zenflow's automation scheduler to run a task daily that queries Stripe for revenue, new signups, and churn signals — then posts the formatted summary to a Slack channel or writes it to a Notion database. No manual exports, no BI tool dependency for routine reporting.
Support-Driven Refund Automation
With Write access to Charges and Refunds, the agent can process refund requests when given the charge ID and a reason — removing the engineering-to-finance hand-off for escalations that need fast turnaround. The agent surfaces the proposed action for review before executing.
Stripe Integration Permission Best Practices
The Zenflow Stripe integration respects Stripe's native permission model. Configure scopes based on your team's actual access needs:
- Read-only for reporting and analytics teams: Set Accounts, Balance, and Charges to Read. Revoke Write on Charges and Refunds. No risk of accidental charges or refunds.
- Write access for support automation: Enable Write on Charges and Refunds only. Keep Accounts and Balance at Read. Scope Write access to specific support workflows.
- Test mode before production: Authorize against a Stripe Test mode account first. Validate prompts and outputs before connecting to your live account. The Zenflow Stripe integration behaves identically in both modes.
- Admin MCP enablement: If your organization has MCP disabled at the Stripe account level, enable it from the authorization screen before distributing the integration to your team.
Frequently Asked Questions About the Zenflow Stripe Integration
How do I connect Stripe to Zenflow?
Open Connections in the Zenflow sidebar, scroll to the Payments section, and click Connect next to Stripe. You are redirected to Stripe's OAuth authorization page where you select permission scopes and click Authorize. The connection completes in under two minutes — no API keys required.
Is the Zenflow Stripe integration available in Code mode and Work mode?
Yes. The connection is established at the Zenflow account level and is available in both Code mode (for development and billing-related debugging) and Work mode (for cross-tool orchestration like automated reporting and customer enrichment).
Does Zenflow store my Stripe API credentials?
No. The integration uses Stripe's standard OAuth 2.0 flow. Zenflow receives a scoped access token — it never stores your Stripe secret key or handles credentials directly. You can revoke access at any time from your Stripe dashboard under Connected Applications.
What is the difference between connecting Stripe in Test mode vs Live mode?
The Zenflow Stripe integration connects to whichever account and mode you authorize. Authorizing a Test mode account means the agent queries test data only. To work with production data, authorize a live Stripe account. You can maintain separate connections for test and production by authorizing different Stripe accounts.
Can Zenflow issue refunds through the Stripe integration?
Yes, with Write permissions granted on Charges and Refunds during the OAuth setup. The agent can process refund requests by charge ID and reason. For production workflows, the agent surfaces the proposed refund action for review before executing — preventing accidental or unintended refunds.
Which Zenflow integrations work best alongside Stripe?
The highest-value combinations are: Stripe + HubSpot (correlate payment events with CRM deal stages), Stripe + Slack (automated daily revenue summaries and payment failure alerts), and Stripe + Notion (billing reports written to structured databases). All are natively available in Zenflow's Connections panel.
Does the Zenflow Stripe integration require a paid Stripe plan?
No. The integration works with all Stripe account types. The only prerequisite is that MCP access is enabled at the organization level — an admin can do this in under 30 seconds from the OAuth authorization screen.
What version of Zenflow introduced the Stripe integration?
The Stripe integration was introduced in Zenflow 2.2.3. Ensure you are running version 2.2.3 or later — update from the Zenflow settings panel if needed.
Get Started With the Zenflow Stripe Integration
The Zenflow Stripe integration is available now in Zenflow 2.2.3 and above. Open Connections in the sidebar, find Stripe under Payments, click Connect, and complete the OAuth authorization in under two minutes.
Start with Test mode — run a prompt like "Get my Stripe account details and show me the last three customers" to confirm the data returns as expected. Then authorize your production account and bring payment data into your development workflow permanently.
If you find the Stripe integration useful, explore pairing it with Zenflow's Sentry integration for billing-correlated incident response, or connect HubSpot, Slack, and Notion to build cross-tool automation workflows.